Valentine's Day
How To Fold Origami Rose For Valentine’s Day Gift
Welcome to TeeNavi‘s guide on crafting the perfect origami rose for Valentine’s Day. In this tutorial, we’ll explore the delicate art of folding paper to create a beautiful and meaningful symbol of love. Whether you’re a beginner or an experienced origami enthusiast, our step-by-step instructions will help you create an exquisite origami rose Valentine, adding a personal touch to your celebration. Join us as we delve into this creative and thoughtful way to express your affection this Valentine’s Day.
1. How to make origami rose for Valentine’s Day
In search of a distinctive method to express my affection, the concept of crafting paper roses came to mind. After a brief online search, I discovered that creating paper roses is a popular and well-loved idea.
1.1 Supplies you need
To create an origami rose for Valentine’s Day, you’ll need only basic craft supplies:
- Scissors
- Ruler
- Craft Glue
- Pens or Pencils
The crucial component is the paper. While I couldn’t find traditional origami paper, I opted for colored A4 paper, which worked surprisingly well. For this project, I used 80gsm A4 paper in red and green, purchasing 100 sheets for $6.50 AUS. You might find colored paper at your school or workplace. Each origami rose for Valentine’s Day requires one sheet for the rose and another for the stem and leaves. Experiment with various paper sizes and thicknesses to discover what suits you best.
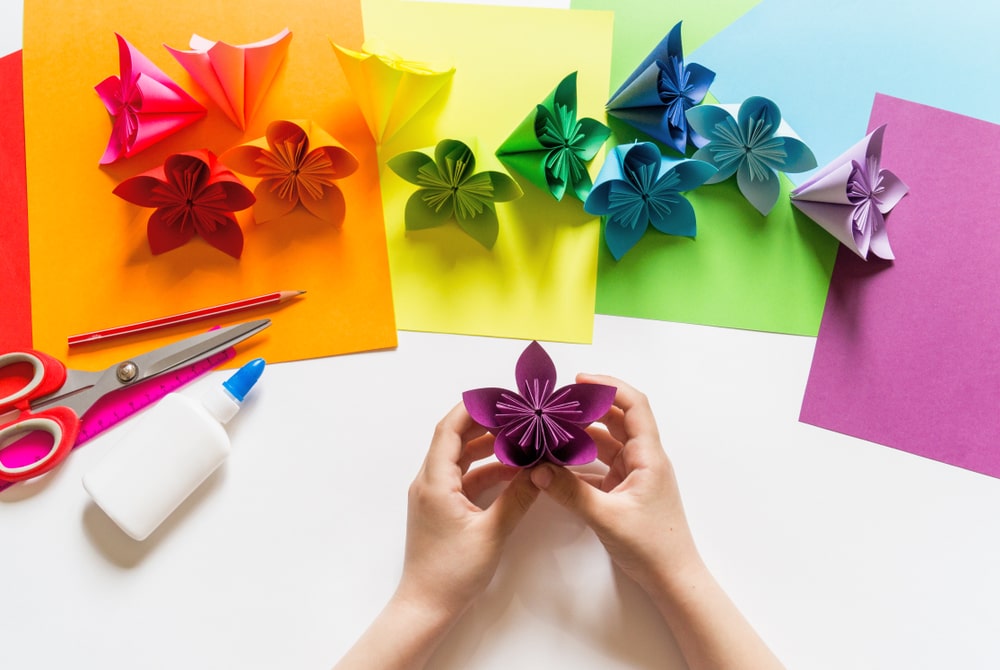
Additional materials include:
- Clear transparent wrap (Cellophane) for around $2 from any newsagency, ideal for wrapping your bouquet.
- 1mm diameter wire, which is optional, for creating sturdier rose stems.
- Ribbon is perfect for tying together your bouquet of origami roses.
>>>> CLICK HERE: 25 best types of flowers for Valentines day to tailor your message
1.2 Step 1 – Fold the rose
To fold an origami rose for Valentine’s Day, begin by selecting your colored paper. Start with a square piece for the rose itself. First, fold the square diagonally both ways, creating intersecting lines at the center. Then, fold each corner towards the center, forming a smaller square. This is the base of your rose.

Next, fold the corners of this smaller square towards the center again, creating an even smaller square. You’ll then lift and peel back these corners gently, mimicking the petals of a rose unfolding. This step requires a delicate touch to give the petals a natural, curved shape.
1.3 Step 2 – Make the stem
To prepare the wire, I first straightened it by stretching it with one end secured in a vice. Once it was straight, I cut the wire into 30cm lengths. Each piece was then wrapped in green paper, with the end securely glued. Although it’s possible to make stems using only paper, the wire adds strength and bendability.

For attaching the stems to the rose heads, I bent each wire end into a shape that made it easy to twist the rose heads onto the wire, followed by a dab of glue for secure attachment. A creative idea that could enhance the look is using silver metallic paper for the rose heads while maintaining the stems in either copper or silver. This combination would add an elegant contrast to your origami rose for Valentine’s Day creation.
>>>> READ MORE: 15 best roses for Valentine’s Day to capture the essence
1.4 Step 3 – Fold the leaves
After searching online for rose leaf designs, I cut out simple leaf shapes from green paper for my Valentine’s Day origami rose. Each leaf was crafted with a small stipule at its base, enabling it to be easily attached to the main stem. I used two leaves per stem, adhering them in an alternating pattern to mimic natural growth.
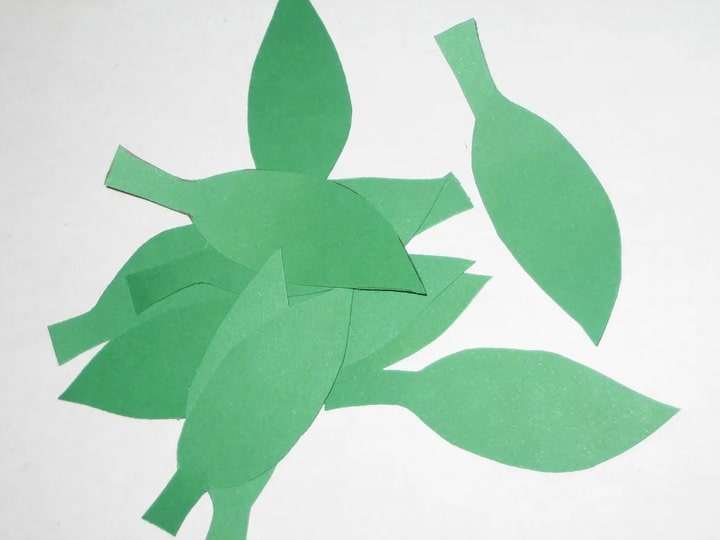
Once the glue set, I gently bent each leaf along its central axis and shaped them to create a more appealing and realistic appearance for the Valentine’s Day origami rose. This added a final touch of authenticity and charm to the overall design.
>>>> LOOKING FOR MORE: Unleash the love with 20 homemade Valentines for preschoolers
1.5 Step 4 – Making the bouquet
A bouquet was meticulously crafted with a dozen origami roses for Valentine’s Day, each carefully bunched and arranged. The stems of these paper roses were securely tied together using a vibrant red ribbon, adding a touch of elegance. To enhance the presentation, the clear transparent wrap was used to encase the bouquet of origami roses, and it was fastened again with a matching ribbon for a cohesive look. Alongside the flowers, a simple yet heartfelt card was created to accompany this unique and thoughtful Valentine’s Day gift.

2. Flat origami rose for Valentine’s Day
Create a special flat origami rose for Valentine’s Day, a perfect handcrafted symbol of love.
2.1 Ingredient
Select two origami sheets of the same size. Ensure they are either the same or similar in color. These will be used for your craft project.
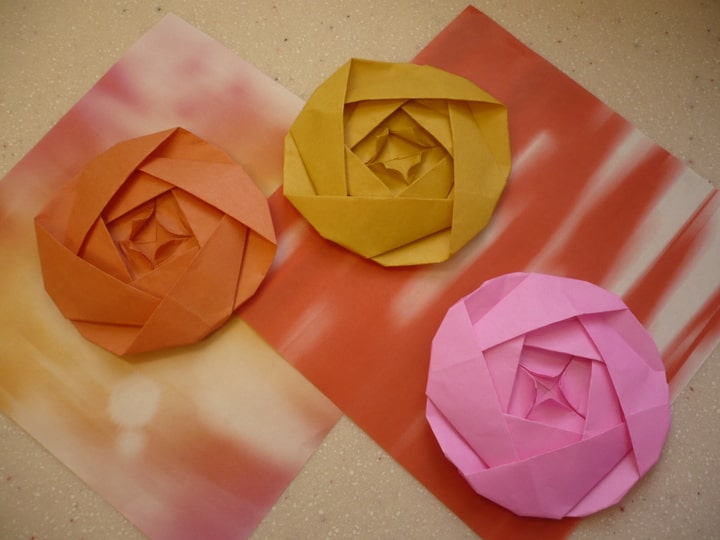
2.2 Step by step
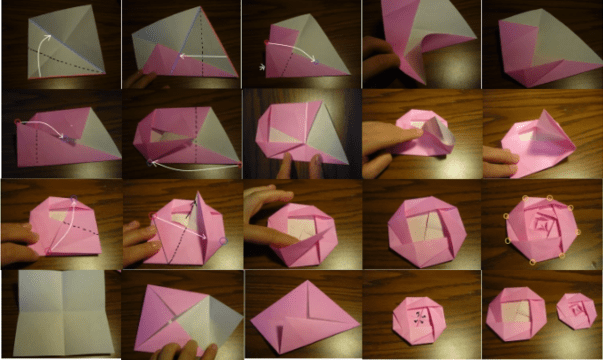
Although the steps are different, they are extremely simple. Detailed instructions on the following steps to make origami rose Valentine:
- Begin with the first paper; fold it diagonally and crease.
- Fold the red side along the blue line you made in step 1.
- Focus on the right side.
- Bring the red point to the blue point as indicated, creating a fold.
- Move to the next section on the right and repeat.
- Fold upwards, aligning the red point with the blue point, and crease.
- Fold outward along the white line, tucking the flap underneath.
- Insert the left red corner into the right blue one to complete the base rose.
- Take another piece of paper, fold it diagonally, and crease.
- Fold each corner towards the center.
- Repeat steps 2 to 8 for this piece.
- Nearly finished! Insert the smaller rose into the first one’s center.
- Optionally, fold back circled points for a rounder origami rose for Valentine’s Day.
3. 3D origami rose Valentine’s Day
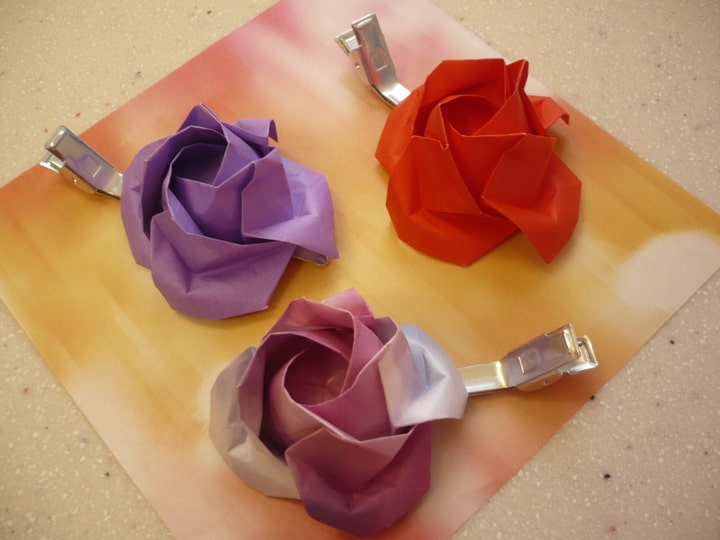
Before I guide you through making 3D Origami, keep in mind that it’s a challenging task. Even for experienced origami artists, it might take at least 20-30 minutes to grasp in person. When I first taught myself, it took around 50 minutes to make an imperfect one.
3.1 Materials
Use two sheets of origami paper of the same size, ideally in matching or complementary colors. This ensures consistency in your origami rose for Valentine’s Day. Selecting similar hues enhances the overall aesthetic and symmetry of the finished rose.
3.2 Instructions
Part 1:
- Begin with a paper sheet; first, crease it into an 8 x 8 grid, making 64 squares. Fold it in half.
- Unfold it, then fold it into quarters.
- Continue folding into eighths, following the creases.
- Rotate the paper 90 degrees and repeat the previous steps.
- It should now look like the image; flip it over.
- Keep the colored side facing up and fold diagonally in both directions.
- Fold the red side to the blue line, creasing only between the diagonal lines.
- Flip it upside down, find a 2×2 square section, and fold as indicated.
- Pinch the folded parts, then flatten and elevate the small square.
- Fold this small square diagonally in half, forming a “mouth.”
- Ensure the origami’s orientation matches the illustration; fold the flap upwards, aligning the red and blue points. Flip it vertically, then fold the flap up again. After a 180-degree horizontal flip, it should resemble the shown image.
- Rotate it 90 degrees and fold as demonstrated in the photos. Repeat on the other side.

Part 2:
- Create and crease dashed lines as shown in the enlarged pictures; these are crucial for your rose’s swirl.
- Flip the paper with the top facing up, holding it as demonstrated in the photo. Gently push towards the center to encourage the origami to spin, creating a more 3D swirl. Refer to the video for guidance if needed.
- Identify two squares to the left and three to the right of one corner. Repeat this step for the other three corners.
- Focus on one corner at a time, bringing the RED point to the BLUE point.
- Fold the BLUE point over to the RED point, shaping it into a triangle.
- Ensure the right side is tucked under the left; use a clip to secure them.
- Start from one corner, folding from PINK point to RED, then RED corner to BLUE, forming a sharp rectangle. Do this for each corner.
- Fold the shape into a box clockwise, tucking the last flap under the first.
Part 3:
- Gently open up the petals by taking the four corners and curl them using your finger, fingernail, toenail, pen, toothpick, or any similar tool.
As we wrap up our origami rose for Valentine’s Day tutorial, brought to you by TeeNavi, we hope you’ve found joy and inspiration in the art of paper folding. Your handmade origami rose is more than just a craft; it’s a heartfelt expression of love and creativity. May this special creation bring a smile and a sense of wonder to your Valentine’s Day. Happy folding, and may your day be filled with love and beautiful moments!
>>>> RELATED TOPIC: How to make DIY Valentine’s day treat bags? Step-by-step guide


I’m Jennifer Tran, a helpful staff member at TeeNavi. My expertise lies in providing valuable advice on gifts and experiences for special occasions such as Halloween, Christmas, and Thanksgiving. I enjoy suggesting memorable experiences, thoughtful ideas, and unique gifts. As a dependable and supportive colleague, I’m always ready to lend a hand when it comes to selecting gifts for holidays.
Related Posts
30 Valentine’s Day games that fun to your romantic celebration
The season of love is approaching, are you looking for interesting and unique Valentine’s Day...
Jan
Whisk Romance With These 35 Valentine’s Day Dinner Ideas
Whatever Valentine’s Day dinner ideas you pick will be fine. The attention you take while...
Jan
Ignite Romance With This 7 Valentine Fireplace Decor Ideas
Do you want to infuse a touch of warmth and romance into your Valentine fireplace...
Jan
40 Best Valentine Day Song For Couple To Spread Joy And Love
Ready to set the mood this Valentine’s Day? TeeNavi is here to help! We understand...
Jan
35 unique and best Valentines movies for nonconformist couple
Valentine’s Day is almost here, and watching some best Valentines movies is the perfect chill...
Jan
30 indoor and outdoor activities for Valentine’s Day to warm love
Are you looking for great ideas for activities for Valentine’s day? Valentine’s Day is an...
Jan