Mothers Day Ideas
Crafted Elegance With 15 Paper Flowers For Mother’s Day Euphoria
Let’s explore the world of paper flowers for Mother’s Day and discover all the means and happiness they can bring to this special occasion. The small, lovingly crafted flowers serve as a reminder of your affection and a representation of the unbreakable bond that exists between a mother and her child. The following article by TeeNavi will provide you with 15 stunning paper flower craft ideas that exude elegance, allowing you to create a Mother’s Day experience filled with euphoria.
1. What You’ll Need
- Colorful paper in squares 15 x 15 cm (6 x 6 in). You may need five or more of each colour.
- Tissue paper
- Sticky tape or Washi tape
- Craft glue
- Hot glue gun
- Glue stick
- Scissors
- Wooden skewers

>>>> LOOKING FOR MORE: Elevate celebrations with 15 Mother’s Day table decorations
2. 15 Easy Lasting memories DIY paper flowers for Mother’s Day
Here are 15 simple yet captivating ideas for making DIY paper flowers for Mother’s Day that will help you create lasting memories for this special occasion.
2.1. DIY paper Tulips
- Step 1: Start with a square-shaped paper or origami paper. Then, let’s make two folds right in the middle of the paper, horizontally, vertically and diagonally.
- Step 2: Grasp the paper’s left and right corners and gently press them in toward the centre. The paper will automatically fold in the direction of the prior fold. After that, it will resemble a triangle.
- Step 3: You need to fold the top left corner to the bottom point. Similarly, you then fold the top right corner to the bottom point. Now turn the piece over and repeat the process on the other side as well.
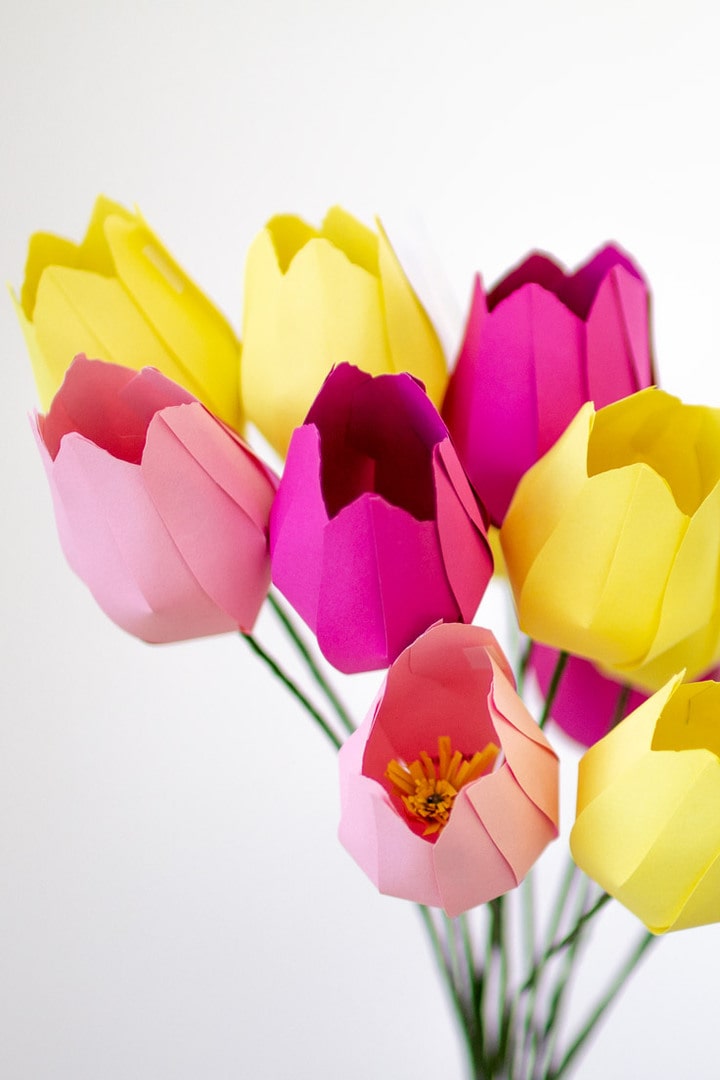
- Step 4: Overlap the right and left sides. Then, you utilize the same method on the opposite side as well. Now bring the left flap towards the centre and fold it along the vertical crease in the middle. Repeat on the other side.
- Step 5: You open the middle of the left flap. Next, place the right flap into the left flap’s centre. To make the fold stable, glue it there. On the other side, repeat the procedure.
- Step 6: Look for the hole on the bottom of the tulip. Inflate the flower to take on its form by blowing air into the opening. Now spread the petals of the tulip to finish it up.
- Step 7: Cut out the stem and leaves for the flower using the template. Take a green piece of paper that measures 2 inches wide by 6 inches long and then roll it into a stick. After applying adhesive to the leaves, place the green stick through the tulip’s bottom hole. And now, you completed the DIY tulips paper flowers for Mother’s Day.
>>>> CLICK HERE: 20+ best Mother’s Day decoration ideas at home
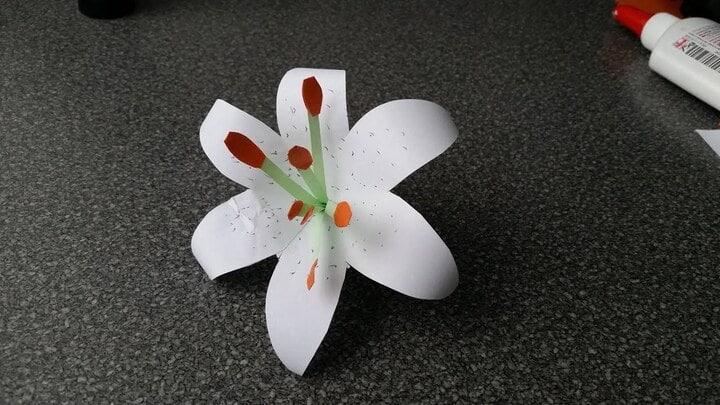
2.2. DIY paper Lilies
- Step 1: Firstly, you cut 12 flower wires, including 6 for the petals and 6 for the stamens. Next, let’s create the paper tiger lily’s stamens by wrapping white crepe paper and brown floral around the flower wire.
- Step 2: Let’s cut out 12 pieces of yellow crepe paper, each measuring 1 inch by 4 inches. Then, glue two of the pieces together, joining them in the middle with a wire. You can use orange watercolour to paint over the petals of the paper tiger lily flower, then add dots to each petal using a black pen to make it look genuine and crisp.
- Step 3: By hand, reshape each pistil by wrapping the stamens together with white tape. After wrapping 6 petals together with blue tape, bend the petals to create the most lifelike paper tiger lily flower possible.
- Step 4: Cut 4 1-inch by 3 1/4-inch pieces of green crepe paper, and then place one pair on the trunk in a symmetrical manner. Thus, we have already finished creating a stunning lily Mother’s Day flower origami.
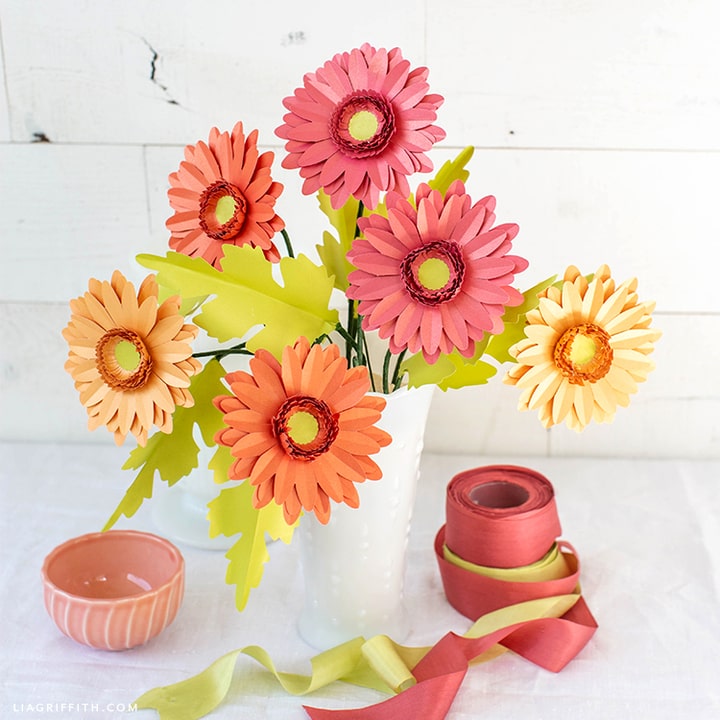
2.3. DIY paper Gerberas – Mother’s Day paper bouquet
- Step 1: Cut a piece of black crepe paper in size 2 cm * 20cm, then trim it into a serrated shape. Apply the same method to a piece of light pink crepe paper that measures 4 by 15 cm, then trim it to a jagged form.
- Step 2: Then, use a pink crayon to paint over the finished pistil of paper Gerbera daisy. To finish the paper Gerbera daisy pistil as seen above, we will use hot glue to join the stamen and pistil to the stem.
- Step 3: After cutting two bright pink crepe paper samples that measure 4.5 cm by 10 cm and 5 cm by 10 cm, respectively, trim each little petal. Gently glue the layers into one another, giving each petal a gentle stroke to give it some softness.
- Step 4: Cut the green crepe paper into a jagged form and adhere it to the completed petals using glue. Now, you already completed the lovely paper Gerbera paper flowers for Mother’s Day.
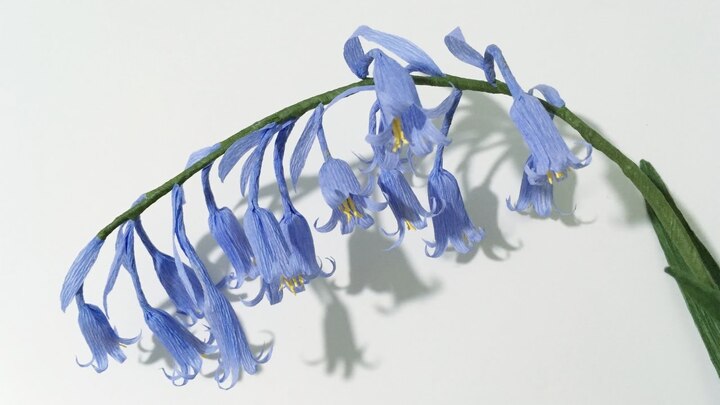
2.4. DIY paper bluebells
- Step 1: Trim sample paper to 3 x 2.5 cm. Every flower is a template. Using scissors, cut jagged pieces of paper to form the petals’ curves.
- Step 2: Cover the paper with glue but do not fill it, just glue it on the edge of the paper. Then, paste the coton ball with the petals and floral wire together. Wrap the blossoms with purple crepe paper.
- Step 3: You simply require cutting a little, thin sheet of paper and pasting it into the flower body. Next, put the little flowers together to create a stunning bouquet of paper Bluebell flowers.
- Step 4: Using a hot glue gun, just cut the blue crepe paper into the desired shape and adhere it to the trunk to create the paper blubell flowers.
>>>> WATCH NOW: 4 simple and beautiful diy Mothers day wreath ideas
2.5. DIY paper Poppies
- Step 1: Let’s arrange three pieces of tissue paper in the colours red, orange, yellow, pink, or gold. If you would want your poppy to be more full, add more layers of tissue paper.
- Step 2: Place the folded tissue paper on top of a circular plastic cover. Make a pencil trace around the lid, then cut off the circle using scissors.
- Step 3: On your working surface, let’s arrange three pieces of tissue paper, either brown or black. After making a 2-inch circle, cut the black tissue paper out.
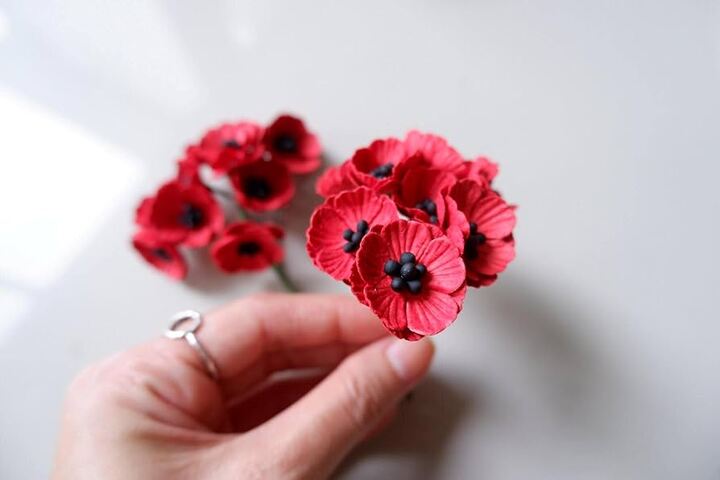
- Step 4: Place the stack of small black circles in the middle of the stack of larger circles. Use a green pipe cleaner and insert it into the centre of the stack. Bend the pipe cleaner down into the shape of a hook, then pull the bent part of the pipe cleaner through the paper so the hook is hidden in the poppy. Apply a tiny bit of white craft glue on the paper poppy to secure it.
- Step 5: Spread the layers of tissue paper to make a ruffled poppy. Put the poppies in a flower vase or other beautiful container to make stunning paper flowers for Mother’s Day.
2.6. DIY paper Hydrangeas – DIY paper flowers for Mother’s Day
- Step 1: Cut out a stack of scalloped circles first. You can fold the paper a couple of times to cut multiple circles at a time.
- Step 2: Take one of your circles, insert the knitting needle about halfway through, and fold it gently in half to create a petal. Just gently fold; do not wrinkle. Fold in half three times in total. Fold again and again.
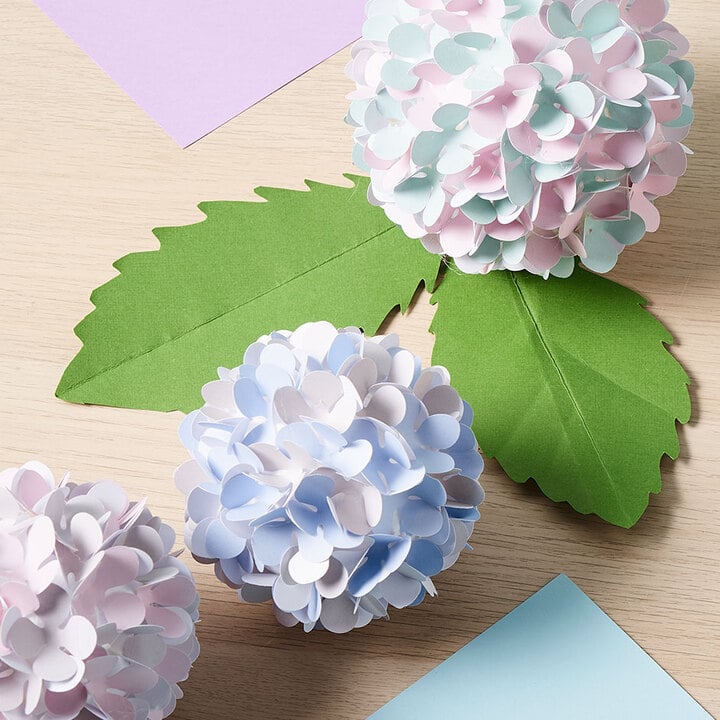
- Step 3: Put a small amount of adhesive on the tip of your petal and insert it into the foam ball. The ball will shatter if you press it into it too much, so just enough stick. Till the styrofoam is completely hidden, keep adding petals. The more randomly you add the petals, the more real your flower will look.
- Step 4: Once the bloom reaches the desired level of fullness, attach a small amount of adhesive to the tip of one of your twigs. Insert a glued end into the middle of your flower. And now, you have finished Hydrangeas paper flowers for Mother’s Day.
2.7. DIY paper Lavender
- Step 1: Cut a green paper strip that is about 8 x 2 inches. Continue to roll the green paper until you reach the other end. To keep your flower stem curled, dab on some adhesive.
- Step 2: Cut out two crepe paper pieces. Cut a fringe all the way around one side of the little piece of crepe paper to resemble the petals of a lavender flower. Take care not to cut through to the other side!
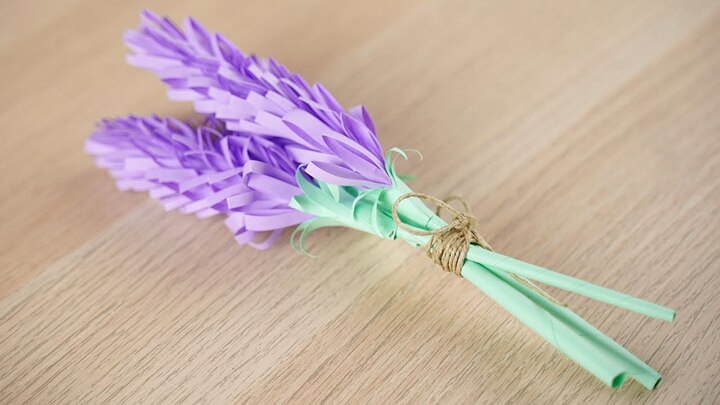
- Step 3: Fold the crepe paper in half lengthways and glue together. Cut a fringe all along the folded side. If you really want to add authenticity to your DIY paper flowers for Mother’s Day, then make the cuts smaller at the narrow end and bigger at the wider end.
- Step 4: Now your lavender flower petals are ready to be attached to your flower stem. Starting with the smaller fringe, glue all along the uncut side and wrap it tightly around the paper stem slowly moving downwards as you go.
2.8. DIY paper Hibiscus
- Step 1: First, you diagonally fold the red square in half. Then fold it in half twice more. After that, fold the straight part toward the diagonal, then cut the excess.
- Step 2: Open it and cut a curve from corner to corner.
- Step 3: Open it and cut two of the petals. Next, make a half-cut just next to the petal you removed. Stick the half petal to the opposite end after adding adhesive to it.
- Step 4: Use a pencil or pen to curl the petals. On the tip, fold each petal in half.
- Step 5: Roll a 1.2′′ x 3.15′′ yellow strip. Secure with glue at the end.
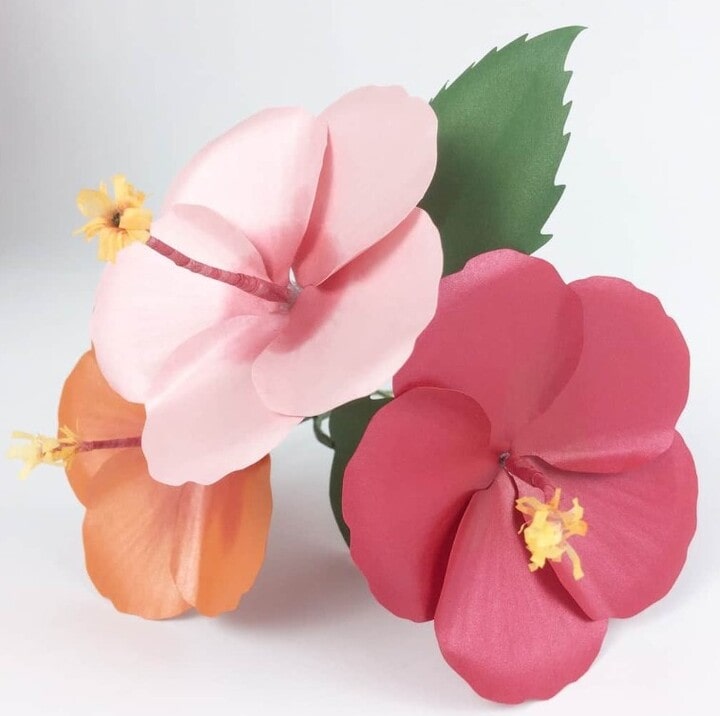
- Step 6: On one of the long edges, draw a line using a 0.8′′ x 3.15′′ yellow strip. Fold it in half, then fold the edge as small as you can. After that, trim it into tiny pieces from the crease to the indicated edge. Use a pencil or pen to curl it.
- Step 7: Encircle the sliced strip inside the yellow spiral. Place into the flower’s centre and secure with glue.
- Step 8: Take a 3.15 x 9.8-inch rectangle, wrap it around the stick, and secure the ends with adhesive. Cut one of the ends into four, then insert and glue the flower.
- Step 9: Take a 1.6-inch square and diagonally fold it in half. Next, fold it in half twice. Make a leaf form, then cut it open. Take off two of the petals, then join the ends with adhesive. Place it onto the stem.
- Step 10: Cut a 2-by-3.15-inch rectangle into the shape of a leaf. Next, roll a 1.2-inch square into a stem shape. First, attach the stem to the leaf, and then to the flower’s stem to finish the DIY paper Hibiscus.
2.9. DIY paper Orchids – Mother’s Day paper flower bouquet
- Step 1: Sketch the basic shape of an orchid petal onto a sheet of paper, or choose an online template for an orchid flower shape.
- Step 2: Trace the form of the orchid petal onto the coloured cardstock or craft paper using the template. To make enough petals for the quantity of blooms you want, repeat this process. Then, using scissors, gently cut off the flowers that you traced.
- Step 3: Using a pencil, gently curl the edges of each petal.
- Step 4: Begin layering the petals to assemble the orchid. First comes the stamen, followed by the two layers of petals and finally the three layers of petals. Use glue to attach each petal as you proceed.

2.10. DIY paper Marigolds
- Step 1: Trace the form of a marigold petal onto the cardstock or yellow craft paper. Using scissors, gently cut off the petals that you traced.
- Step 2: Gently bend each petal individually. To make the petals look more lifelike, you may also gently bend them.
- Step 3: Begin piecing together the marigold by arranging the petals in layers. Take one petal and run a thin line of adhesive along the underside of it. Then, put a second petal on top, overlapping it just a little bit. To make a full, blooming marigold, you keep stacking the petals and varying their placements and angles. Using glue, attach each petal as you proceed.
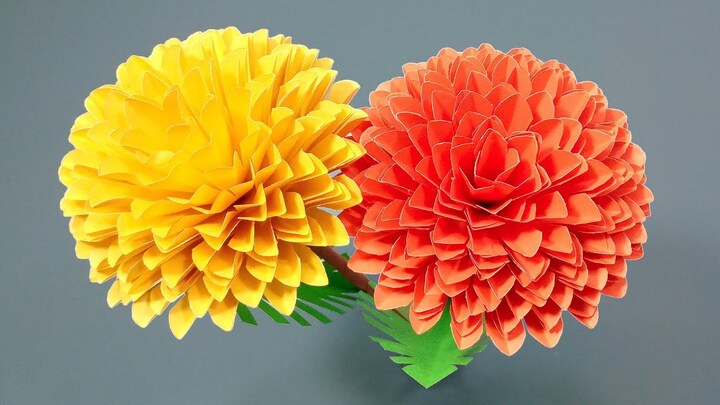
- Step 4: Cut a small circle or oval shape out of the yellow cardboard or craft paper to use as the marigold’s centre. Let’s apply a dot of glue in the centre of the assembled petals and then attach the yellow centre to it.
- Step 5: Using the green cardstock or craft paper, cut out leaf shapes. They might be tear-shaped or extended ovals. Using adhesive, affix the leaves to the flower below to complete the craft paper flowers for Mother’s Day.
2.11. DIY paper Magnolia – paper flowers for Mother’s Day
- Step 1: Using your cream crepe paper, cut out six big petals. Stretch the paper grain to create a deep bowl shape. Put three huge petals on the bottom with hot glue and press them in place.
- Step 2: To create a deeper bowl shape and slightly more body than the previous one, fold the bottoms of the three huge petals that are still there.
- Step 3: Alternately place the three new petals and the three huge petals using hot glue to create a floral shape.
- Step 4: Using your cream crepe paper, cut three little petals. Then, stretch the paper’s grain to create a deep bowl shape. Fold the bottoms of your mini petals in the same manner as your large petals.
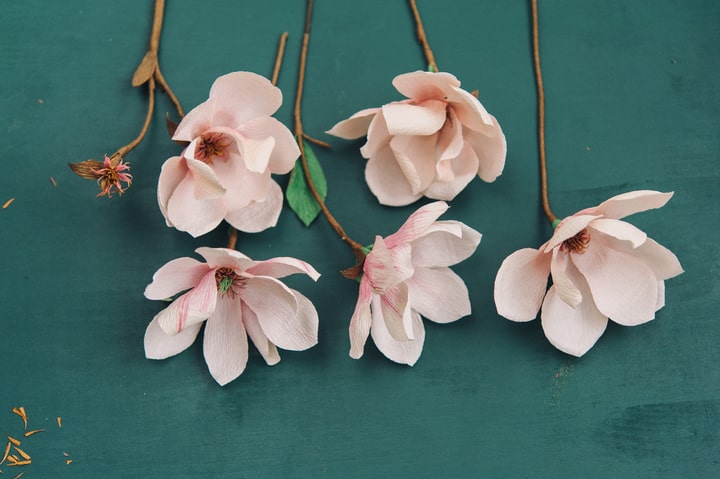
- Step 5: Alternate the locations of the last petals and adhere the little petals on top of the large petals.
- Step 6: Using your cream crepe paper, cut out one bud. Stretch the paper grain of your bud to form a smooth square.
- Step 7: Form a tight ball out of a small piece of scrap paper. Using a small amount of hot glue, attach the scrap paper ball to the top of the polystyrene sphere. Using your bud square, cover the polystyrene spherical, twisting the extra crepe paper at the bottom. Apply a liquid gold leaf to the bud to make it golden. After drying, trim the bottom of the bud.
- Step 8: Attach the bottom of the bud to the centre of your flower using hot glue.
2.12. DIY Paper Daisies
- Step 1: Cut out many 8-petalled flower forms using a paper punch or die. You will use 2 of the shapes per daisy.
- Step 2: Then, you fold each petal lengthwise as near to the centre as possible,
- Step 3: After folding the petals, let’s stack the flower shapes on top of one another and secure them with glue so that the petals alternate.
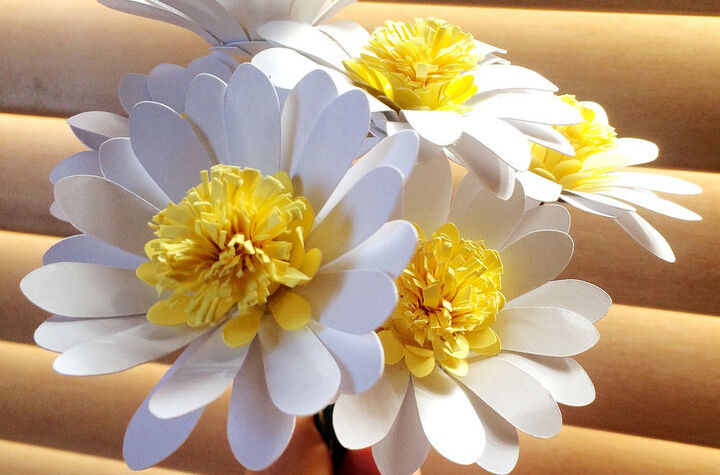
- Step 4: Using a quilling tool or toothpick, coil yellow quilling strips for the flower’s centre. Utilize a pair of quilling paper strips for every floral centre. Simply attach the second one there when the first ends and keep coiling. Place the flower centre with glue.
- Step 5: To provide a surface for hot glue to grip and attach the floral wire to the flower again, make a bend at the end of your floral wire.
2.13. DIY Paper Peonies
- Step 1: To begin, carefully rub and round the edges of each petal with a foam pad and a wooden doll form or paper flower shaping tools. To curl the petal inwards, gently wrap its edges around the preferred instrument. Repeat this process with each of your petals.
- Step 2: Put a little bit of hot glue on the top of a wire stem to serve as the stamen. Attach one end of the fringed piece to the glue and tightly wrap it around the tip of the wire, then add more glue. Extend the fringe segments and gently curl the tips toward the top.
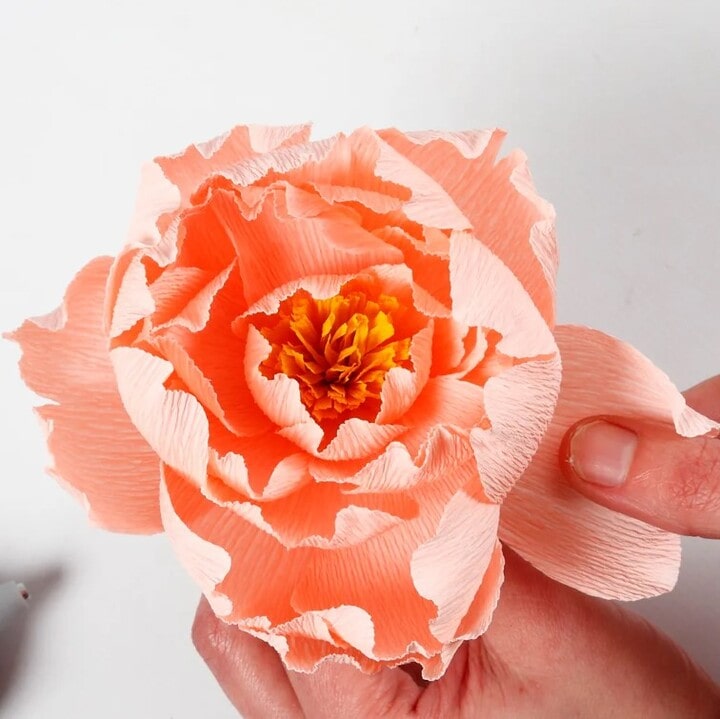
- Step 3: One by one, add 3 to 6 small petals by threading the wire through the centre hole and binding with hot glue. Next, add 3 to 6 medium-sized petals at a time, and glue them in place.
- Step 4: Glue the floral base in place. Tie flowery tape around the stem.
- Step 5: Roll up bits of paper to form a ball that is one inch across to create a peony blossom. Using hot glue, attach your bud shape to a floral wire stem.
2.14. DIY Paper Lisianthus
- Step 1: Using the tissue paper, cut a strip 20 cm (8 in) in length and 10 cm (4 in) in height through all of the layers in the pack.
- Step 2: Begin rolling the tissue paper strip. This time all your folds are in the same direction. About 1.5 cm (0.6 in) should be the width of the folds. Remember to crease each and every fold.
- Step 3: Now, cut a V shape out of the top of the folded strip. When you unravel the strip, the lisanthus’s petals appear in a zigzag pattern.
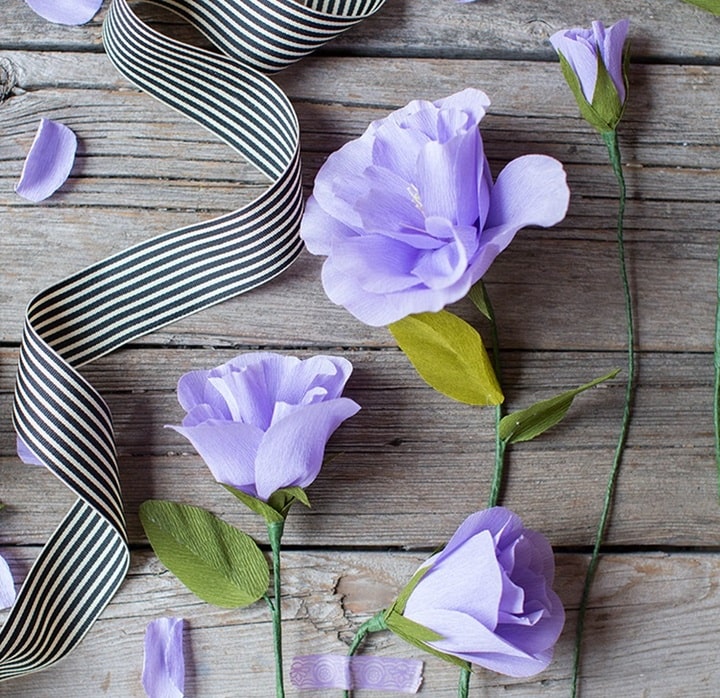
- Step 4: Insert the wooden skewer into the lower left corner of your strip using adhesive. Wrap the strip around the stick to begin rolling. As you roll, make several folds around the bottom of the strip. These folds serve to make room to enable the flower to open when rolled.
- Step 5: After rolling around the stem, firmly wrap the flower with Washi or adhesive tape to secure it in place.
- Step 6: Just carefully peel each tissue paper petal apart from the others to separate them. Arrange and fluff up the petals to add volume to your lisianthus paper flowers for Mother’s Day.
2.15. DIY Paper Dahlias
- Step 1: Cut a square piece of paper 6 x 6 inches with a distinct pattern or colour on both sides. To get a different colour on each side, you just glue two pieces of paper together.
- Step 2: With the green side facing up, place your paper on a level surface. Fold the paper diagonally, then you will have a triangle. After unfolding the paper, fold it once again on the opposite diagonal.
- Step 3: Flip the paper over and open it. The pink side is now pointing up. Fold in half lengthwise. Once more, unfold the paper and fold it on the other diagonal.
- Step 4: Unfold the paper to reveal an ‘X’ and a cross formed by the folds. Bring the cross lines down so that they meet in the centre, keeping the ‘X’ scored lines up.
- Step 5: At this point, fold each portion to one side. At this stage, your ‘X’ should have all four of its ‘legs’ collected together on one side.
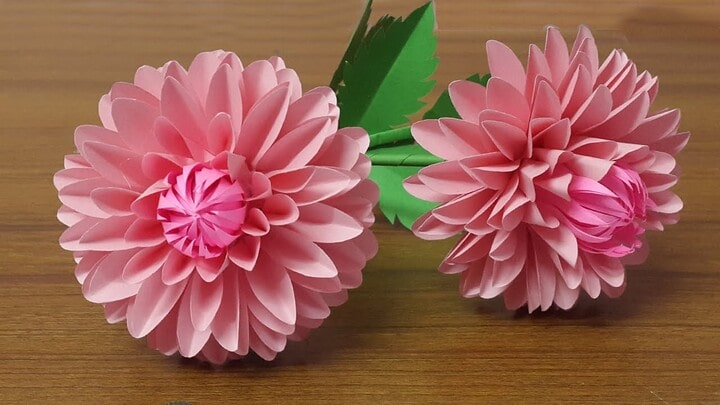
- Step 6: Spread craft glue along the middle line where all of the folds come together and open up the structure. After pressing each edge down toward the adhesive, keep it in place until it is firmly in place.
- Step 7: Gently open up all the petals with your fingertips to give the flower a better form.
- Step 8: Create three or four more flower components by following the same procedure.
- Step 9: Arrange every component of the flower around the wooden skewer and secure it with hot glue or craft glue. Your Dahlia paper flowers for Mother’s Day are now prepared!
Giving your mom these handmade flowers is a concrete way to express to her how much you love and appreciate her. So, for Mother’s Day bliss, unleash your imagination and enjoy the pleasure of creating elegance with these 15 paper flowers for Mother’s Day collected by TeeNavi.
>>>> LEARN MORE: 9+ easy Mother’s Day bath salts diy that you don’t miss


I’m Jennifer Tran, a helpful staff member at TeeNavi. My expertise lies in providing valuable advice on gifts and experiences for special occasions such as Halloween, Christmas, and Thanksgiving. I enjoy suggesting memorable experiences, thoughtful ideas, and unique gifts. As a dependable and supportive colleague, I’m always ready to lend a hand when it comes to selecting gifts for holidays.
Related Posts
20+ Mothers Day Games To Play For Mom And Kids
Are you looking for unique ideas for Mothers Day games to play? Mother’s Day is...
May
Make Mom Smile With These 30 Mother’s Day Activity Suggestions
Mother’s Day 2024 is just around the corner, have you got some Mother’s Day activity...
May
12+ Simple But Unique Mother’s Day Decoration Ideas For Church
Are you looking for wonderful Mother’s Day decoration ideas for church? Mother’s Day is a...
May
3 Mother’s Day Origami Flower Easy Craft Your Love In Every Petal
Make your own Mother’s Day origami flower easy, why not? These flower origami ideas are...
May
15+ Mother’s Day Mason Jar Craft Ideas For Heartfelt Gifts
Mother’s Day is an ideal opportunity to express your love and gratitude for the amazing...
May
How To Make DIY Mother’s Day Bouquet: Step-to-step Tutorials
Mother’s Day 2024 is coming, do you have any great ideas for a DIY Mother’s...
May